For posterity and possible help for others, here are some notes on the second wave of models that I made. The first part is here.
Lar Gibbon
Gibbons are known to be specialized brachiators, using their arms to propel themselves under their support, so I knew that the gibbon has to be posed up high in the midst of that dynamic motion. The first pose I made based on references was lackluster. I found a better view of a gibbon in mid-brachiation than what I had used earlier. The added extension of the arms and the twist to the body really made the model a gibbon.
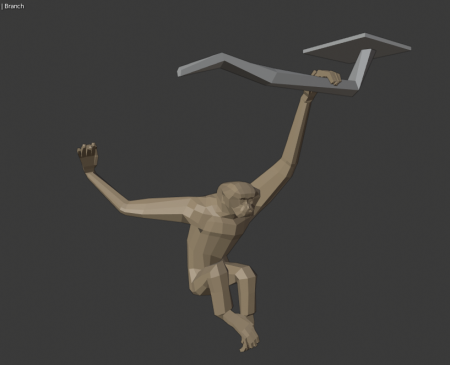
{ Caption: Right: old and busted. Left: the new hotness. }
The gibbon was the first model where I really needed to color it more accurately to make it resemble the real animal. Something about the beige, white, and black tones were iconic to the gibbon’s face, and if it was all beige then it just looked off. I looked up tutorials on vertex coloring, which emanates colors from the vertices to the faces they are a part of. I kept the shading flat so each polygon had a color, but I could designate certain zones to be different colors. Adding new edges to demarcate the colors helped with tweaking their locations. Then I baked this color information to a texture map. The improvement to the model from vertex coloring is clear:
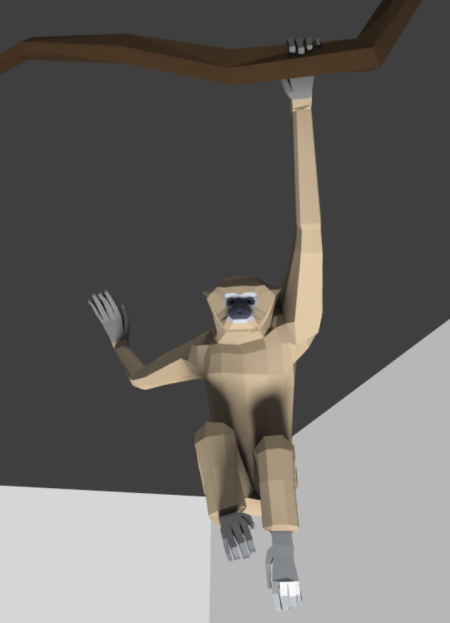
I found a tip on optimizing the texture file that worked well for the gibbon. Due to the extreme height of the model, it was unlikely that a visitor to the site could see the back and top of the head of the gibbon. In the texture map, these hidden areas are greatly reduced so the parts that are visible, such as the face and limbs, are given more space in the map for higher detail.
After the success with vertex coloring with the gibbon, I went back and colored the earlier Scale Model Hall models. The gorilla got a silver back. The mouse lemur got white stripes and belly, and pink extremities. The rhesus monkey got pink un-furred areas. Vertex coloring became a built-in part of the modeling process from this point on.
Notharctus
Alternating back to the past, I knew that the first standalone prehistoric primate model must be Notharctus. As with the gorilla that used to be at the Museum of Man, seeing the mid-leap pose of the skeletal Notharctus at the American Museum of Natural History really made an impression on young me. I knew that not only would Notharctus be represented, but it would have the exact same pose as in the museum, based on one of my photos and some like-minded Internet photographers.

{ Caption: My photo of Notharctus at the American Museum of Natural History. }
Posing based on a photograph had some challenges in depth since that was not recorded. Some other photos of the same display online helped but a lot of the final pose was set just by experimenting with the positions of the limbs until it matched all the references. For a color that is realistic for primates but also interesting, I went with a combination of modern red ruffed lemurs and bamboo lemurs to get a three color combination.

{ Caption: The final Notharctus model. }
Update: I forgot about the orangutan!
Bornean Orangutan
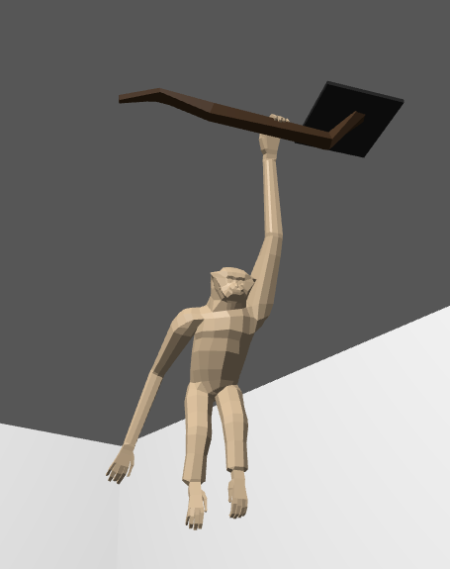
Before I went to the next completely new model, I had the idea of refitting the Gigantopithecus into a modern day orangutan. Instead of just shrinking the scale of the model, it seemed right to put the orangutan in a different pose. What’s more different than standing and reaching up? Sitting and reaching down! As a little extra effort, I decided on a Bornean orangutan while the Gigantopithecus was based on a Sumatran orangutan. Seated, the orangutan looked smaller than I had imagined but looking at my photos from the zoo confirmed the size is accurate, considering that zoo orangutans are heavier than wild ones.

{ Caption: “Stay awhile, and listen. }
Howler Monkey
I chose the next living primate to model because its traits are just so fun. The male howler monkey has a distinctive huge head due to its enlarged vocal organs. Its body is unremarkable in comparison, but at the far end is a prehensile tail. Oh yes, and a large stark bright scrotum that acts as a backup plan for sexual selection. I found a good photo reference that highlights all of these traits as the monkey is twisted along a branch in mid-shout. This was the first model with an open mouth, but was otherwise not challenging.

{Caption: Howler monkey with final pose but before final color tweaks. }
Megaladapis
A koala the size of a black bear. I must model it! I’ve been personally curious about what a living Megaladapis would’ve looked like so I was really looking forward to this model. Research took longer than usual due to confusion among researchers preferring different classifications of Megaladapis fossils. It turned out one of my early photo references was of a different species than the one I intended so I had to make some big changes later in the process. Existing reconstructions also varied in quality so I was more on my own for reconstructing the soft tissue on the skeleton.
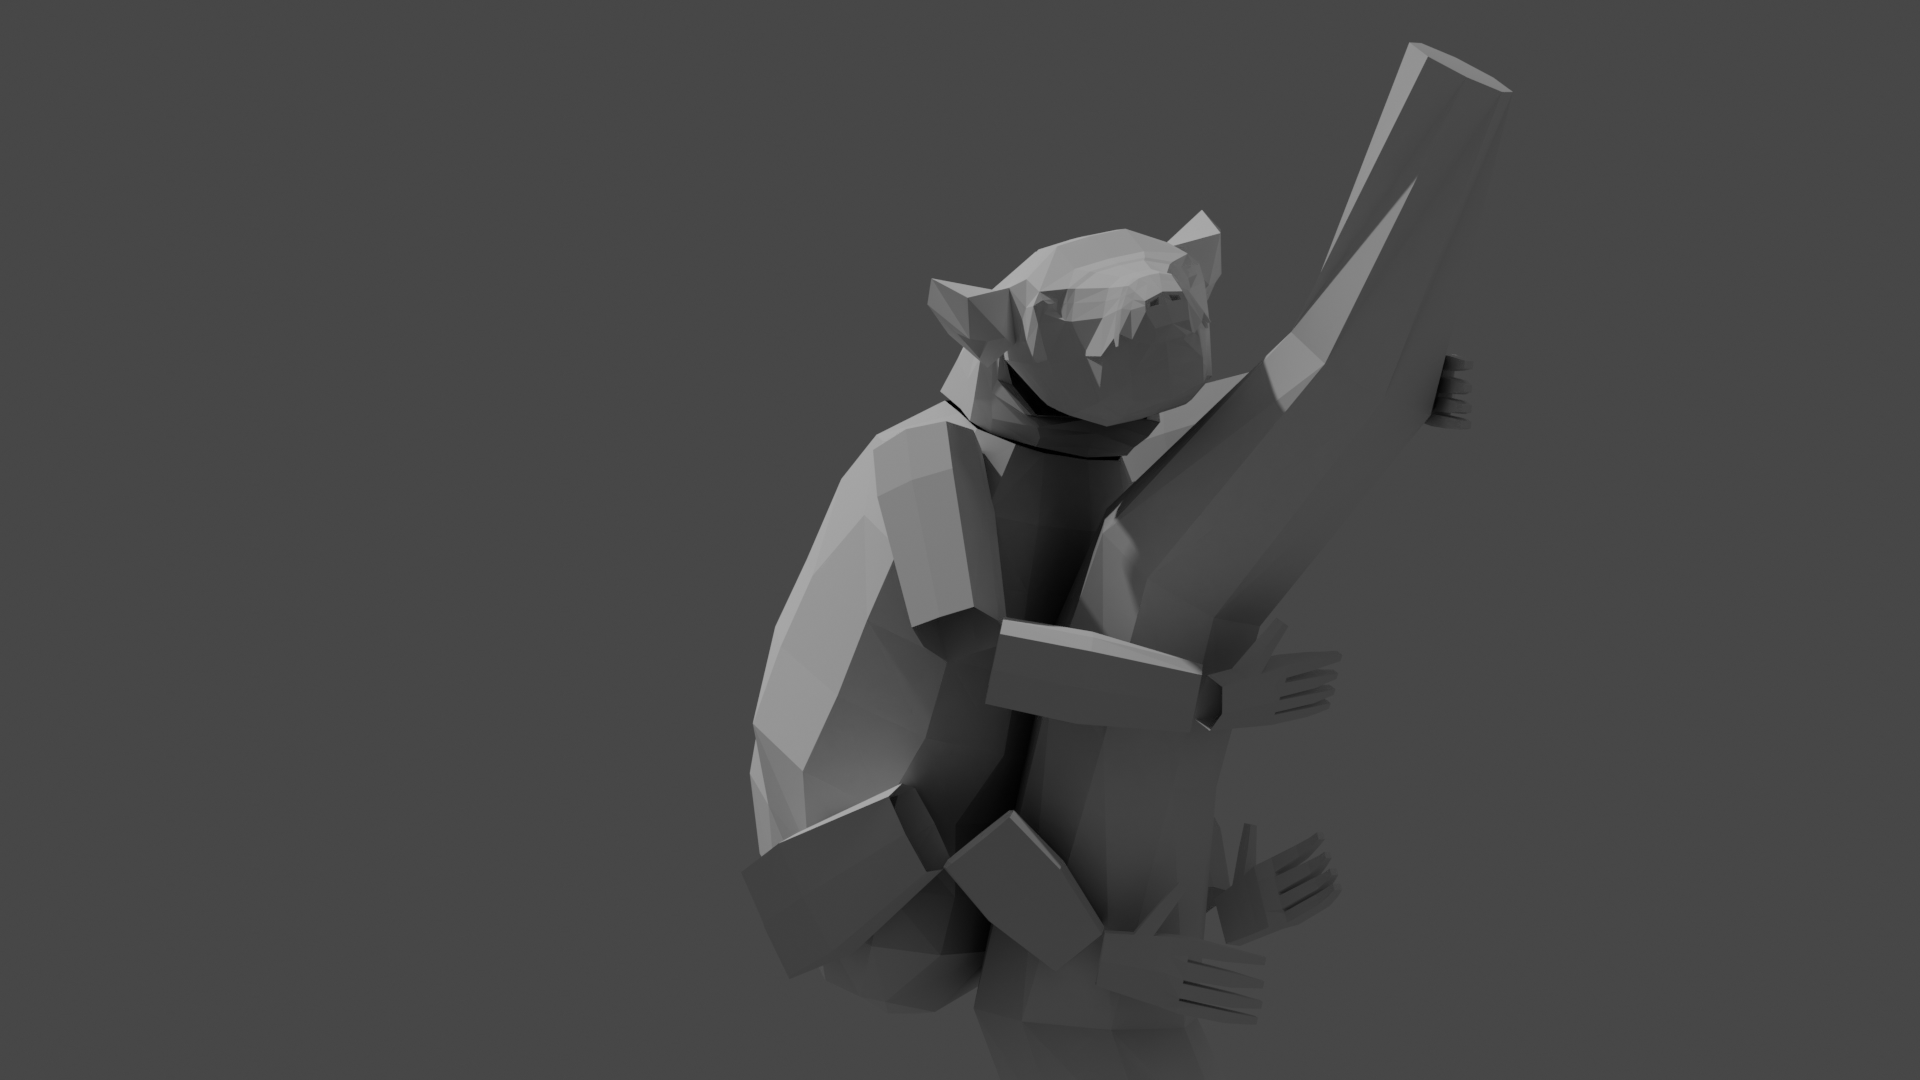
{ Caption: Megaladapis during limb posing phase. }
More decisions arose towards the end of modeling. I settled on a vertical pose, supported by a scientific paper that came out during the modeling process that supported this interpretation of Megaladapis’ habitat. The head is colored following the ring-tailed lemur while I broke from the convention of using the nearest living relative and used koala colors for the body. Koalas, while very distantly related mammals, have an ecology close to what Megaladapis had, and had standard mammal coloration.

{ Caption: Final Megaladapis featuring a poofy tail as inferred from fossils and koalas. }
The Megaladapis is one of my favorite models and I always give it a close look on the way to test some other feature on the site.
I consider these to be the second wave of models as I learned more tricks from Youtube and applied them more and more. In a future post I will continue to recount the modeling process into the third wave.
Wow Keith! These look great. I love seeing your progression. I wonder how far you will go:)