In the last two parts, I related how I stumbled into 3D modeling and printing over the summer. I had two projects, a Homo naledi skull and some busts of my comic character for my friends. While the former was being printed, the latter kept growing in scope. Instead of one stock bust, I made four different looks. They are:
Goggles on, mouth closed (prototype, busts 2-4)
Goggles on, mouth open (busts 5 and 6)
Goggles off, mouth open (busts 7 and 8)
Goggles off, mouth closed
The last one… is pretty boring. I changed it instead to:
Goggles off, tongue out (busts 9 and 10)
I had ten busts to print total: four of the first variant and two of each other version. Looking around on 3D Hubs, I found a printer in the listings nearby who had some previous work with organic designs. I ordered one print of the first variant just to see what it would look like. This became the prototype, and the one I kept for myself.

{ Prototype bust with hair flippy attached. }
The shape of the hair posed some challenges with overhangs and supports. The tips of the hair were too small, so they snapped off along with the supports. Unexpected, but I liked the effect and the randomness of it. I had another three busts printed this way, but a drawback with this type of printing became too problematic to ignore: the bust was just not stable enough as it was being printed. Each print took several attempts to print without falling apart at the chin and hair tips level. A lot of plastic was wasted, which made the process more expensive.
The printer recommended printing the bust upside down so the hair sections could support themselves as they are built up in space. I had two printed this way (busts 3 and 4), but they came back looking rougher than the first prints. More of the bust needed support, even though the structure was more stable this way. As a result of the orientation, there were more rough patches on the bust. The rough sections were also located at highly visible areas – the top of the head and shoulders, rather than on the underside of the chin and hair.
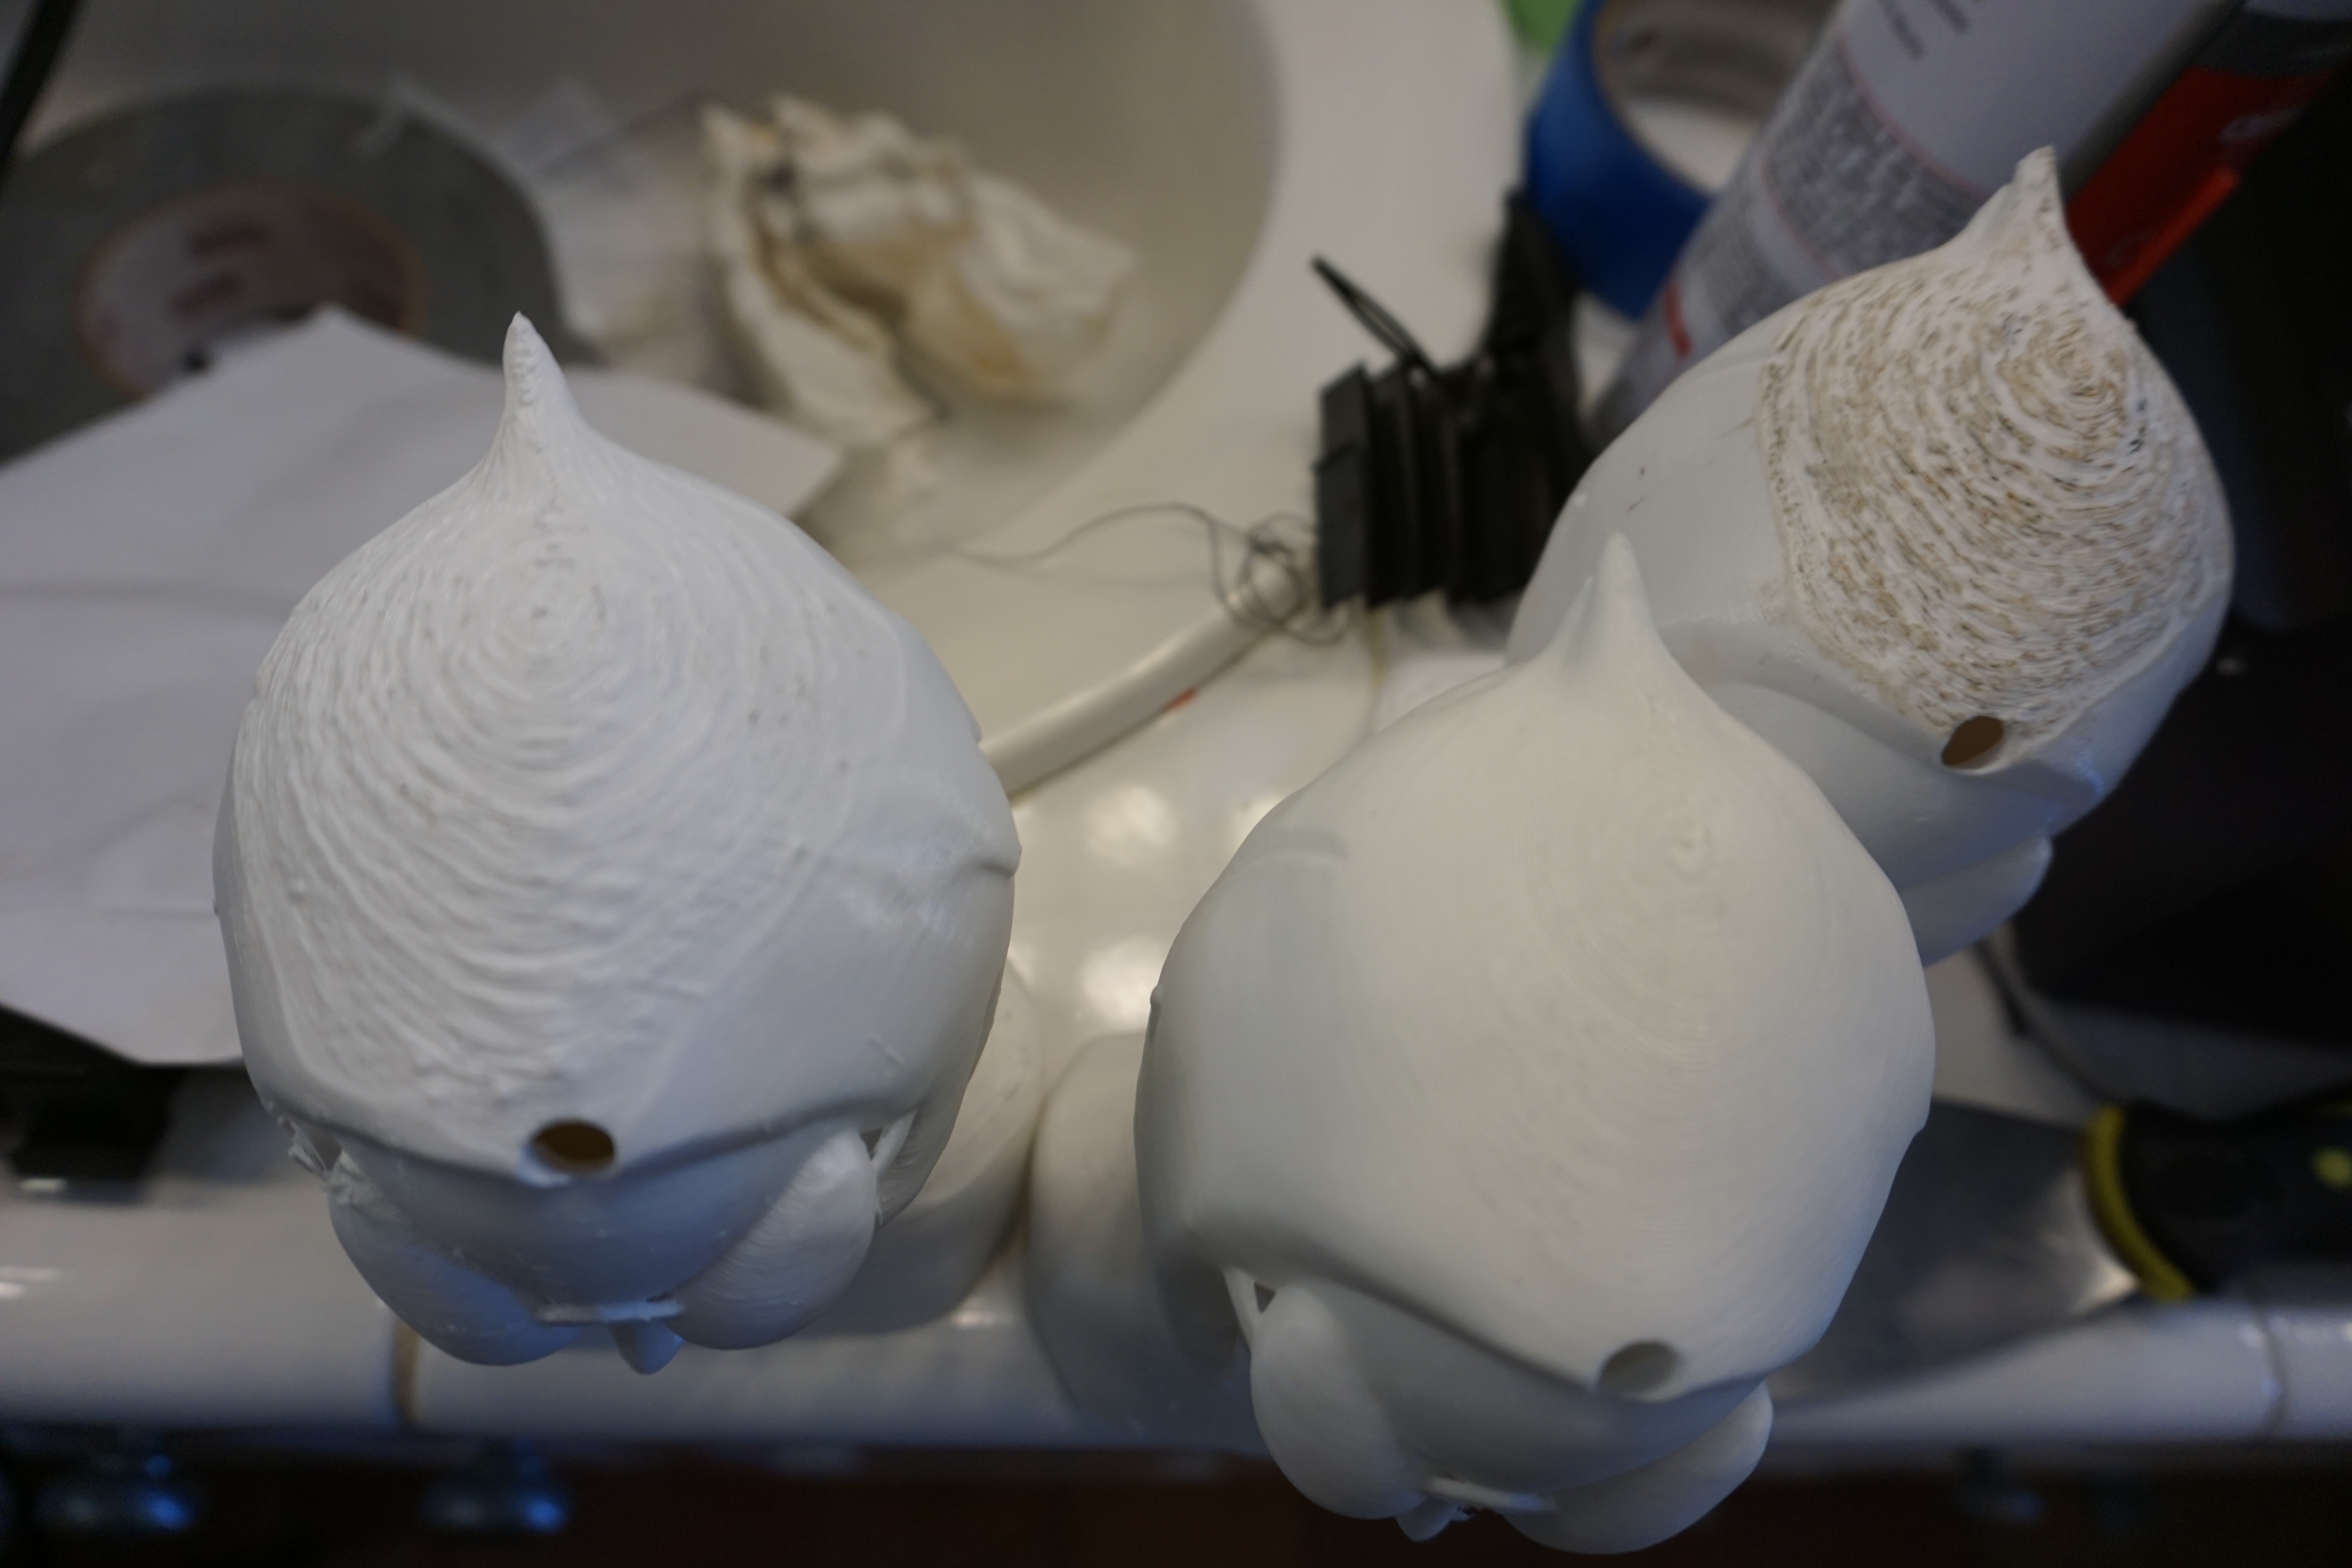
{ Photo comparing scalps of bust 2 printed right-side up (center), and busts 3 and 4 printed upside-down (left and right). Lots of work would be needed to get closer to the look of bust 2! }
I looked for another solution for the busts left to print. A guide on 3D Hubs used a simple example, but had a good solution for reducing the amount of support: cut the bust into front and back halves and print those separately, then glue them together. The printer and I used this idea for busts five, six, nine, and ten. Lastly, busts seven and eight were printed right side up in a different type of plastic (ABS instead of PLA).

{ Bust 5: Front and back halves just before gluing with super glue. I considered just shipping them as bookends. }
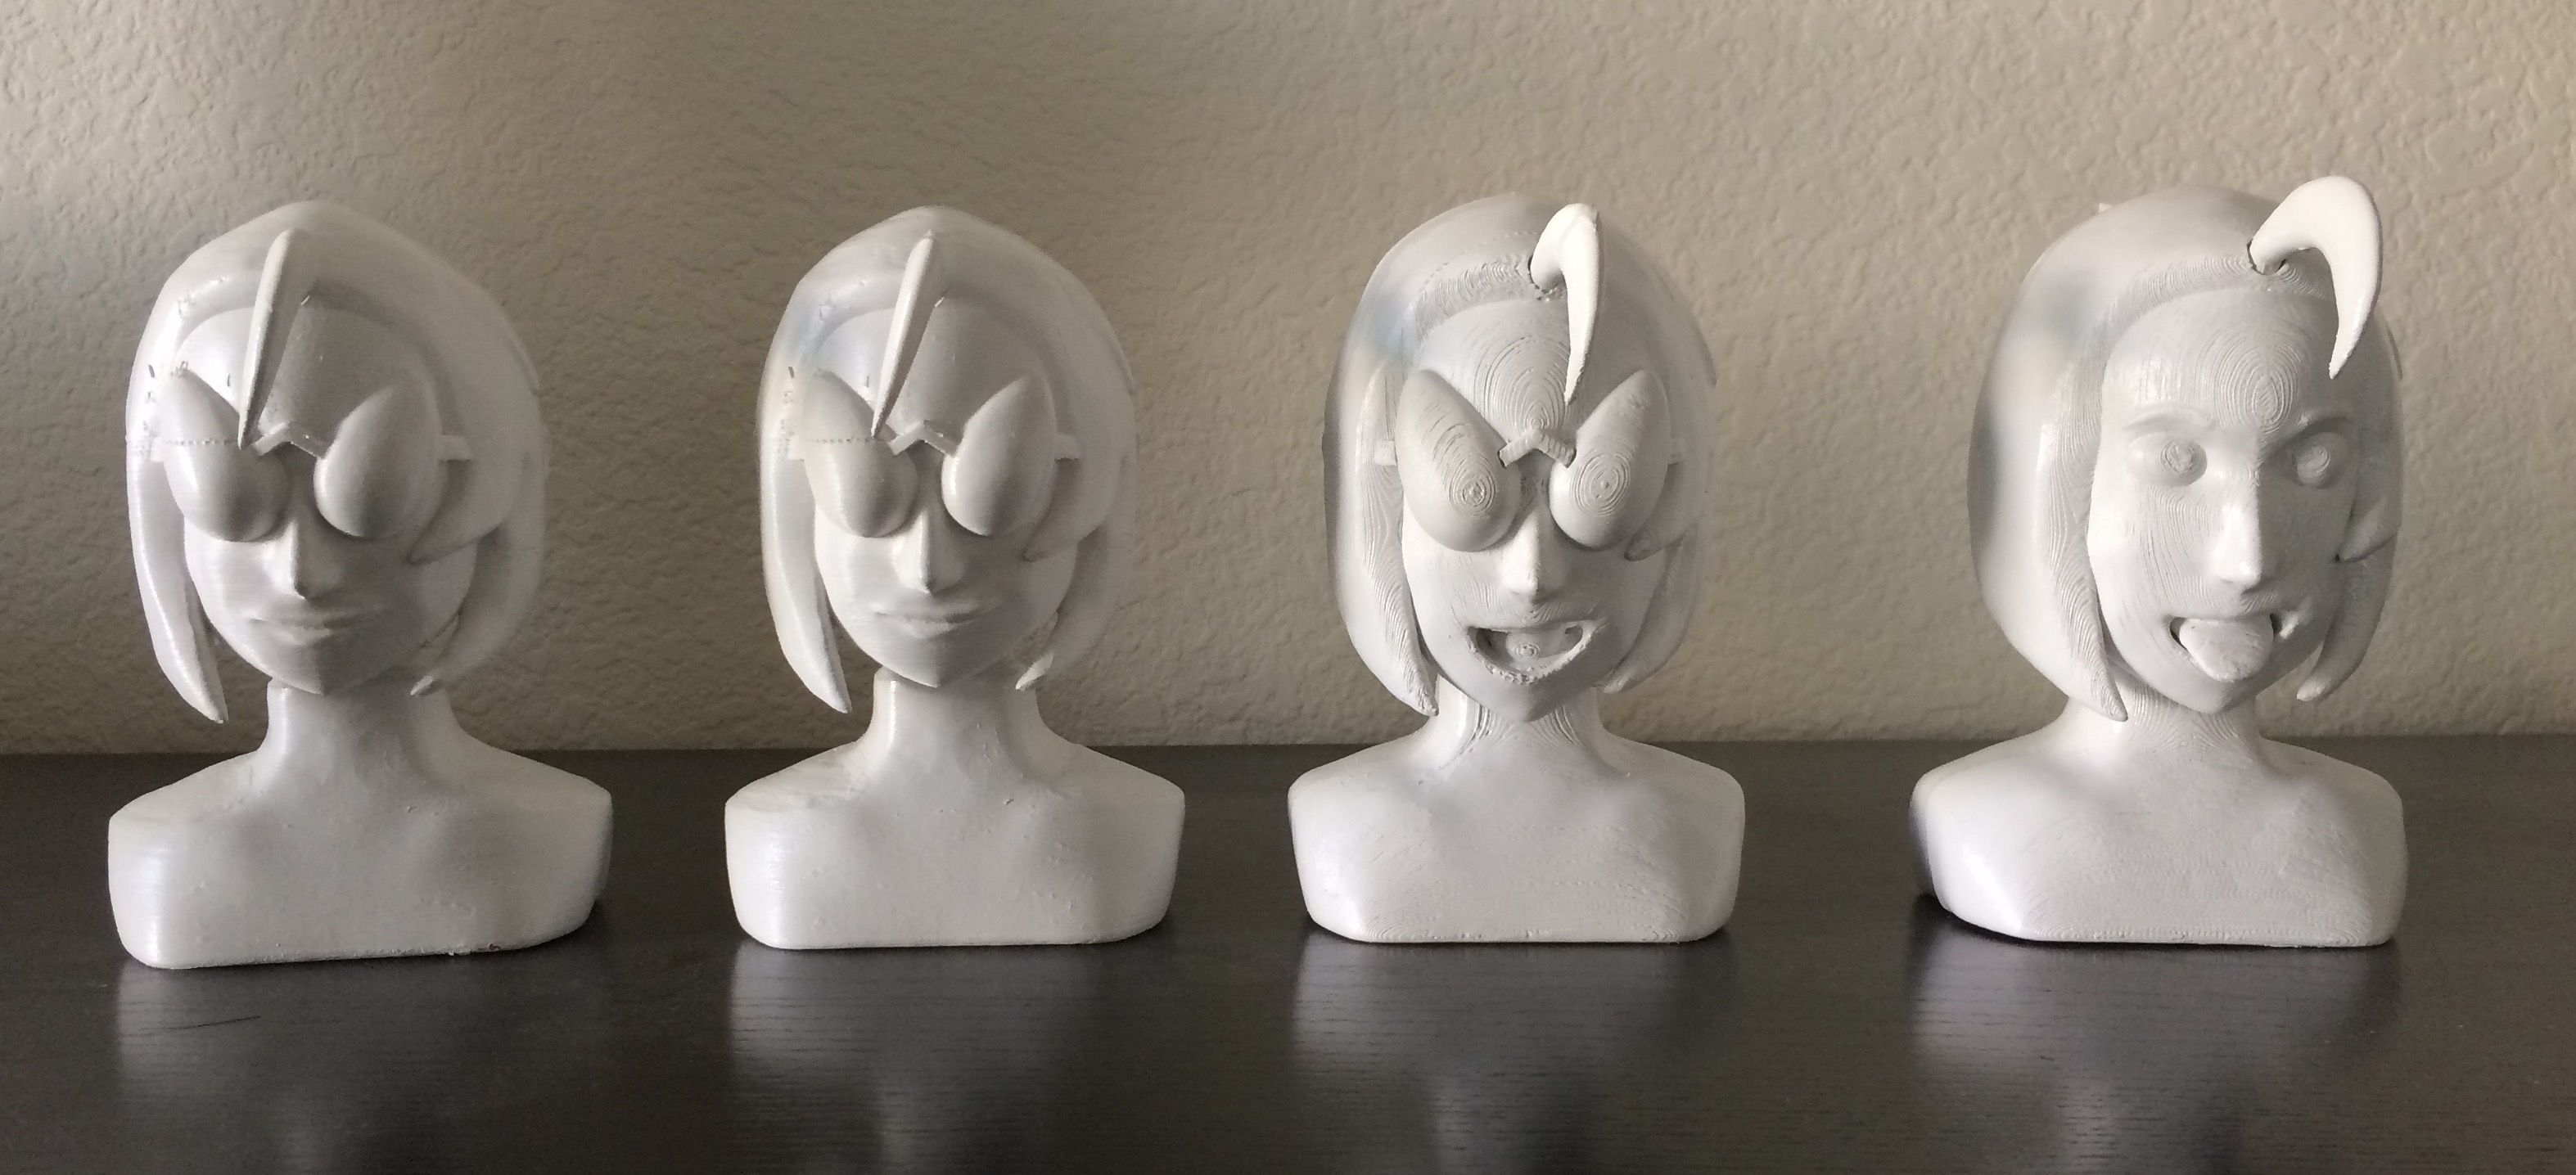
At the end of the printing phase, I had six busts that looked good, two that had to be smoothed, and four that had to be glued. As my previous post and other work presented on this site suggests, I am more of a digital art than traditional art type of person. I experimented with various ways of smoothing and filling the rough sections of each bust, to a good amateur level. I also primed and spray painted a several of the busts to give them slightly differently looks than the plain plastic. My original plan in May was to paint the busts with comic-accurate colors, but it was already past Christmas at this stage! When they were all done, I lined them up for group photos:

{ Group photo of some of the finished busts. From left to right: bust 2, 5, 7, 9. The hair flippies for bust 7 and 8 (identical and not pictured) had to be painted to match the ivory color. Luckily, my mom painted a fence in her yard a very similar color. }
{ Group photo of busts 3, 4, 6 and 10. 3 and 4 had the rough scalps from being printed upside down. Filling with Bondo and sanding made them less noticeable. These four busts were the ones that were spray painted. }
With the busts completed and the Homo naledi skull in progress, my 3D printing projects are nearly wrapped up. I had a great time picking up another hobby. As I work on the comic more, having the bust helped standardize the character’s look. I don’t know about more 3D printing, though. At this stage of technology, 3D printing still has too many uncertainties. Maybe years from now 3D printing will be as easy as paper printing is today. Who knows what I would dream up to do by then?